Product and Node Installation Guide
Install Products and Nodes to Your KNIME Analytics Platform
Hey there! You'd like to get your hands on some new fancy products and nodes? Although the process to install them into your KNIME Analytics Platform can be a bit cumbersome, you will definitely manage it by following our product and node installation guide.
If you haven't done yet, please install the KNIME Analytics Platform. The latest release for Windows, Linux and Mac can be found here.
Nodes are usually installed from Update Sites (also sometimes called Software Sites). Update sites contain products that are technically just packages that contain nodes. Therefore, in order to get a new set of nodes, you just need to install its product from its update site. Dead simple!
If you are struggling with installing products and nodes to your KNIME Analytics Platform, please get in touch with us using our feedback form.
Install via NodePit for KNIME
The easiest way to install new nodes is using our extension NodePit for KNIME. It allows you to browse NodePit within your KNIME Analytics Platform and download each node by just pressing one button.
In case you don't have NodePit for KNIME installed yet,
follow
these instructions
to get it up and running in KNIME.
After having successfully installed NodePit for KNIME, go
to View → Other… and activate the view NodePit. The
view will be added to your current perspective. Arrange and move it
according to your preferences.
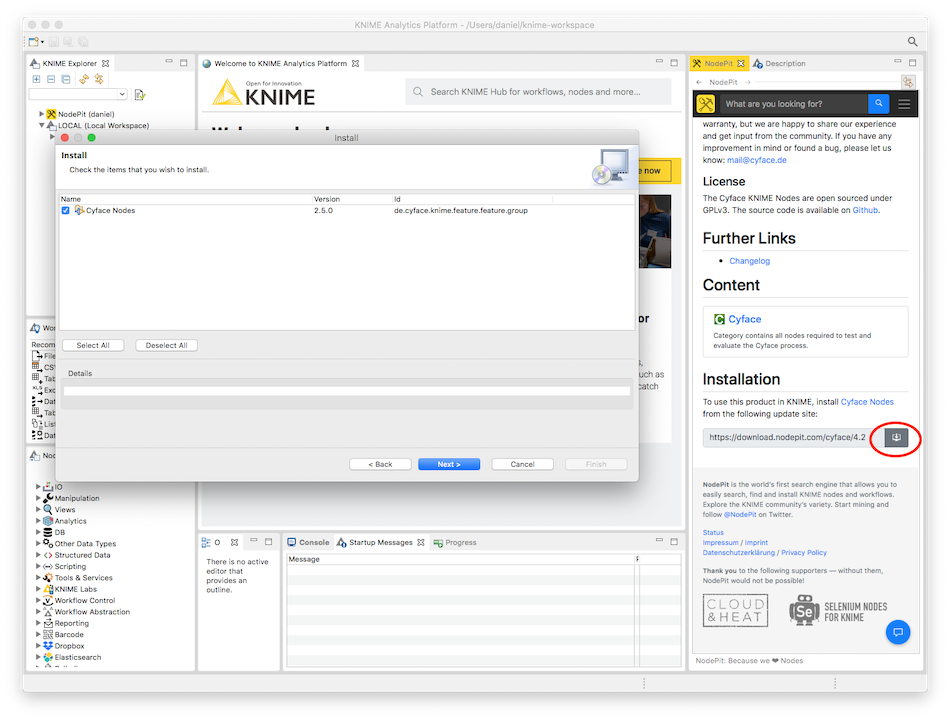
From now on, you just need to browse a product or node in your view
NodePit within your KNIME Analytics Platform and click the
download icon next to the update site in the Installation
section. NodePit for KNIME will automatically determine the
update site and product name for you and start the installation
process. Follow the instructions and restart KNIME when prompted to
do so. After a successful installation, you will find the freshly
installed nodes in your Node Repository.
Install via Update Site
Usually, you start the installation process with two information
available, the update site
(e.g. https://download.nodepit.com/5.12) and the product
name (e.g. NodePit for KNIME). Both information is listed on
each and every node and product page on NodePit.
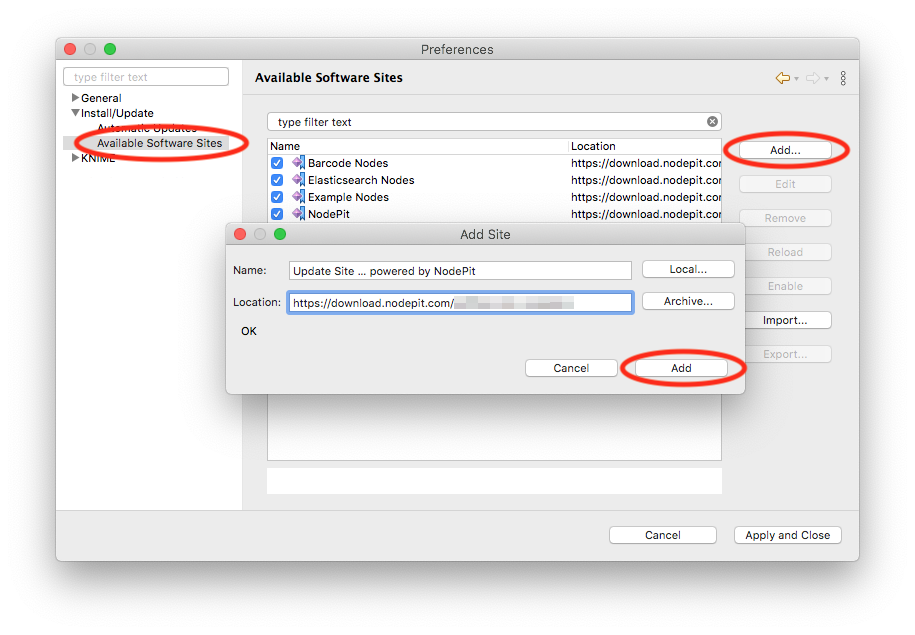
After starting KNIME, go to
File → Preferences → Install/Update → Available Software Sites,
click on Add… and paste the update site. Make sure the update
site matches your current KNIME version.
In order to install nodes behind a firewall or proxy server, most
developers also provide update sites as ZIP archives for download. If a
zipped update site is available, NodePit will also list this in the
Installation section in the side bar on each product and node page.
In order to install nodes from a zipped update site file, add a new
update site by hitting the Archive… button and select the
downloaded ZIP file. Attention: Keep in mind, that you will have to take
care of keeping your installation up-to-date by manually downloading new
versions regularly.
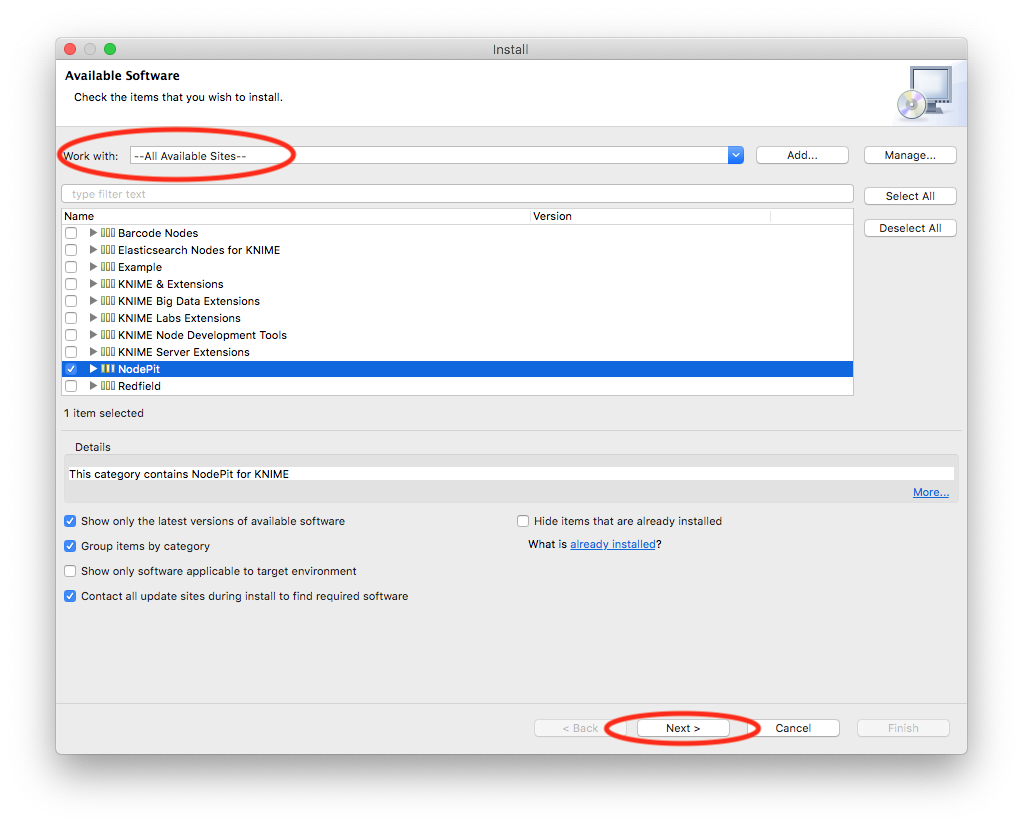
Once added, save and close the preferences window, choose
File → Install KNIME Extensions…, choose
Work with: -- All Available Sites -- and select
the product's name
for installation. Follow the instructions and restart KNIME when prompted
to do so. After a successful installation, you will find the freshly
installed nodes in your Node Repository.
You might see a warning regarding missing signing/certificates. You can safely ignore this. Most community developers of free and open source products do not sign their products to avoid large costs for acquiring certificates.
Install via JAR File
Occasionally, developers do not provide (zipped) update sites, but
distribute their products and nodes as plain JAR files – watch out for
the file extension .jar. In order to install from a JAR file,
you need to download and copy the file into your dropins/ folder
in your KNIME Analytics Platform installation directory. Upon restart of
KNIME the new nodes will get picked up by the application and show up in
your Node Repository.
Enter Product License
Some products require a license to work. For most of these products,
you can purchase a license or start a trial directly on NodePit.
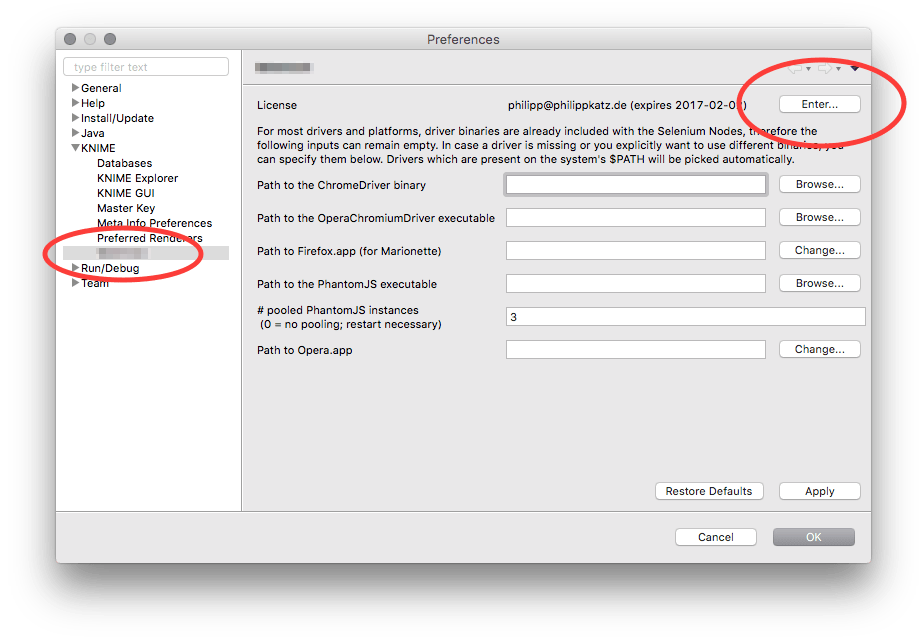
To enter a license in KNIME, open KNIME’s preferences, navigate to
the preference page File → Preferences → KNIME → NodePit for KNIME,
click Enter… and paste the license which your received via email
after purchase, including the lines -----BEGIN LICENSE----- and
-----END LICENSE-----.